

How To Change Rear Camera In L322 Retrofit


Video Overview
The Range Rover Idiot box feature provides Television on the navigation display, support for rear backup camera, support for video input for DVD player and outputs for rear headrest monitors. The installation is a quick 15 minutes.
Parts required.
ane) 10mm socket
2) Range Rover Boob tube retrofit kit
Open the Storage compartment on the rear left side of the machine where the navigation estimator is located,

Panel Removed

Remove the plastic floor piece below the access panel to gain access to the radio mounting subclass screws. Remove the single screw belongings the trunk mounted radio in place. Remove the radio simply past pulling up with the single screw removed.

Remove the 4 screws property the radio bracket in place including the ii screws beneath the radio

Once the bracket screws are removed, remove the subclass and install the Goggle box video module. This bracket holds the Tv video module on one side and the Radio module on the other side. Attach to the bracket with the single spiral

Put the subclass back into place, and screw the screws back in to their right locations.

Connect the bluish and white connectors that came with your Tv set retrofit kit direct to the Television set video module. In club for the Television feature to operate you lot will demand to connect the Television antenna connectors to the Idiot box video module. The kit does not come with the Television antenna wiring or antenna amps. If desired, you can purchase these parts from your local Land Rover dealer. The Antenna amp function numbers are XUO000040. The BMW equivalent part numbers are 65 25 6 990 093. 1 of the antenna leads may already be in your Rover. the BMW function numbers for the antenna leads are 61 xi 36 415 124 right side and 61 11 36 415 125 left side.
The RCA plugs that are attached to the White plug are the video input, output and Rear backup photographic camera connections.

Prior to replacing the radio wiring harness, remove the small white plug from the radio harness plug


Take the encompass off the white plug and connect the two pins into position 11 and 12. Plug the yellow wire into position eleven and the yellow/blue wire into position 12. Once you have added the audio plugs to the radio, plug the white plug back into the radio harness connector and connect back the radio.

Disconnect the blue plug on the back of the navigation figurer. Connect that blue plug into the socket on the Idiot box video module retrofit kit and connect the new plug into the dorsum of the navigation computer. Warning! Never disconnect the plugs on the navigation computer with the lights on the navigation drive. The lights volition extinguish themselves after 2 minutes of not touching annihilation in the machine including opening doors!

Turn on the ignition to test out. If Tv is not shown right abroad, plow off the automobile and permit it sit down for virtually 45 minutes before trying again.
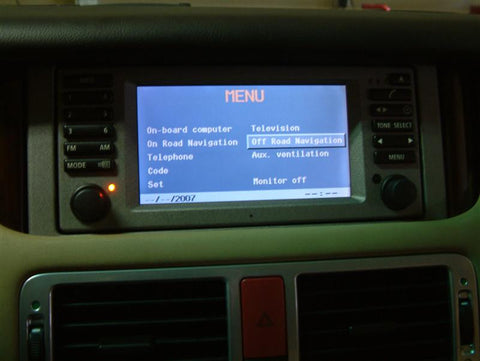
Tv on navigation screen

Television receiver Video module with Rear backup camera


Once Installed to actuate rear fill-in camera merely start the car, and put in opposite

The camera I used was a mirror image version so that it is equivalent to looking in the rear view mirror. I prefer it this way myself, just at that place are other cameras available without the mirror image. This backup camera is now offered on our webstore

Source: https://store.bimmernav.com/blogs/installation-range-rover/upgrading-the-2003-2004-range-rover-with-television-and-backup-camera
Posted by: quirogaughtmed.blogspot.com
0 Response to "How To Change Rear Camera In L322 Retrofit"
Post a Comment